For those who prefer written directions instead of watching video tutorials, this guide will help to get you started.
Index (clickable links)
- Initial Setup
- Entering Transactions
- Splitting a Transaction
- Entering a Transfer Between Accounts
- Entering Recurring (Future) Transactions
- Deleting Rows, Inserting Rows, and Sorting Transactions
- Reconciling Transactions with your Monthly Bank Statement
Initial Setup
- After downloading the file, if you’re using a Windows PC, you’ll see a few warnings about “blocked macros” and possibly a prompt to “enable content”. It’s important to address those warnings so that you’ll have the full functionality of the spreadsheet. For instructions on this, please see How to Unblock the Checkbook file after download.
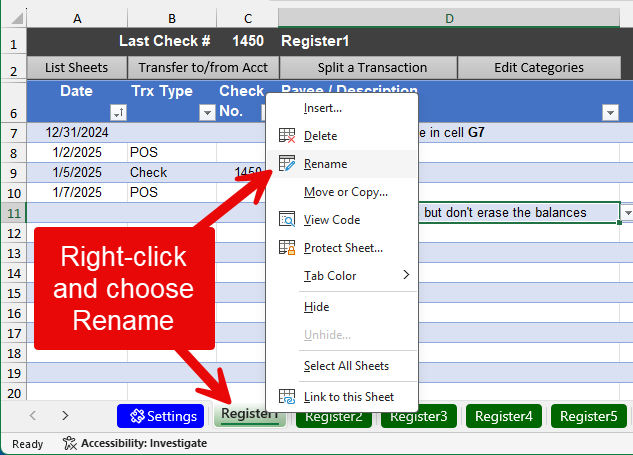
- When you open the spreadsheet, you’ll normally arrive at the Register1 worksheet. There are several sample entries that you’ll want to delete. The safe thing to do is to use your mouse to select the cells just below the starting balance, and then continue to highlight down through the sample entries. See sample screen below and the yellow highlight. After doing so, press the Delete key on your keyboard to clear those samples.
- The first row (row 7 or row 8, depending on your version) has a note to enter your starting balance in the Deposit column. Depending on the date that you decide to start entering transactions, e.g., January 1, you’ll need to determine your bank account balance on that date and put it into the G column cell. You should also enter that starting date.
Important: the date that you enter in the first row should be the oldest date in that worksheet so that you can safely re-sort your worksheet on the date column in the future.

- [Optional] You’ll probably want to give your register worksheets a better name! Instead of Register1, you might rename it to be Main Checking, or Savings Acct, or Wells Fargo, etc. To rename a register worksheet, use your mouse to right-click on a green tab and then choose Rename.
Entering Transactions
When you enter a bank transaction in a register, there are a few cells that are optional and some that are required. Here’s a quick review.
- Date: while you can potentially skip it, a date is important to have! There’s a drop-down list to make it easy to enter a date, but you can also type in a date in any of these formats: 4/25 or 4/25/25 or 4/25/2025. If you use that shorthand of “4/25”, when you press enter (or the Tab key or an arrow key), Excel will assume you meant the current year and it will auto-correct it to be “4/25/2025”.
- Trx Type: short for transaction type, this is an optional field that you don’t have to populate. Why might you do so? If in the future you would like to filter your transactions by type, e.g., show me all my credits (deposits), then this field can be beneficial to you.
- Check No.: if a paper check was used to pay, put the check number in this column. When you go to reconcile your monthly bank statements, having check numbers will be how the spreadsheet can determine which withdrawal amounts are from checks vs. other types of withdrawals.
- Payee / Description: you can enter any description that you like in this cell. Please note that if you leave this field blank, the balance column won’t show for that row. This was done for aesthetic purposes.
[Optional] This field supports having a drop-down of frequently used payees. Visit the Settings worksheet to customize that list. - Withdrawal: enter the dollar amount for any purchases or payments that you’ve made in this cell.
- Deposit: enter the dollar amount for any deposits (credits) that you receive. Please note that while it’s technically possible to enter a withdrawal and deposit in the same row, please don’t do so as it will make the reconcile process difficult to complete.
- Balance: the current balance will automatically be calculated. This column has a complex formula. If you accidentally delete the formula in one of these cells, you can copy the formula from a cell that is above or below it. Here’s a short video on that topic.
- Rec: this is short for reconcile. If you want to do a monthly bank statement reconciliation, you can put an “R” or a “c” (for cleared) in this cell. You normally do this when reviewing each transaction from your bank statement to ensure you have entered each one correctly. Putting either letter (R or c) in this cell will mark that transaction as having been reviewed and confirmed for accuracy.
- Sub-Category: this is a drop-down list for categorizing each transaction. Please note that you can also start typing in this cell and you’ll see choices that contain the letters you type. Visit the Settings worksheet to customize that list, or click the grey button at the top that is labeled Edit Categories. You’ll find additional instructions on that page about it all. Note: if you see inconsistent calculated formula warnings, see this.
- Category: this is a broader categorization which is auto-populated when you pick a sub-category. This field is used by the Dashboard and Reports screen so that you can easily see how your money is being spent across the various types (e.g., Living Expenses, Food/drink, Utilities).
- Type: this is usually either Income or Expense, which is auto-populated when you pick a sub-category.
- Memo: this is an optional cell for adding additional notes about a transaction.
Splitting a Transaction
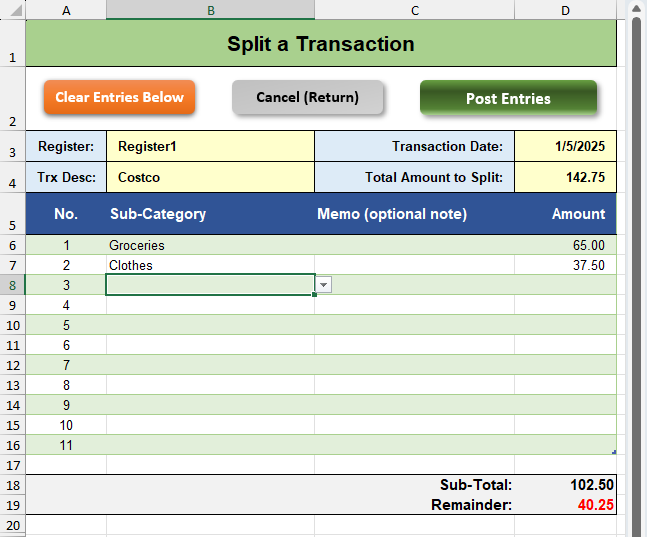
There are times when you have a large transaction, and you would like to more accurately categorize it all. For example, maybe you went to Costco and spent a large amount of money on groceries, clothing, and gifts. But you don’t want to categorize the entire transaction as groceries!
So for larger transactions, just make sure your mouse or cursor is on that row in the register. And then you can click the bottom at the top of the register called Split a Transaction. When you do so, you’ll arrive at the screen shown below. The transaction’s original dollar amount will be shown, and you can start choosing different sub-categories and enter a dollar amount for that sub-category. The bottom of the screen will show you the remainder — the remaining amount that you still need to account for. When you’re ready, click the Post Entries button and you’ll be returned to your register with your transaction now split out across your different sub-categories.
Just make sure you have categorized all of your major items so that the remainder is zero before you post them!
Entering a Transfer Between Accounts
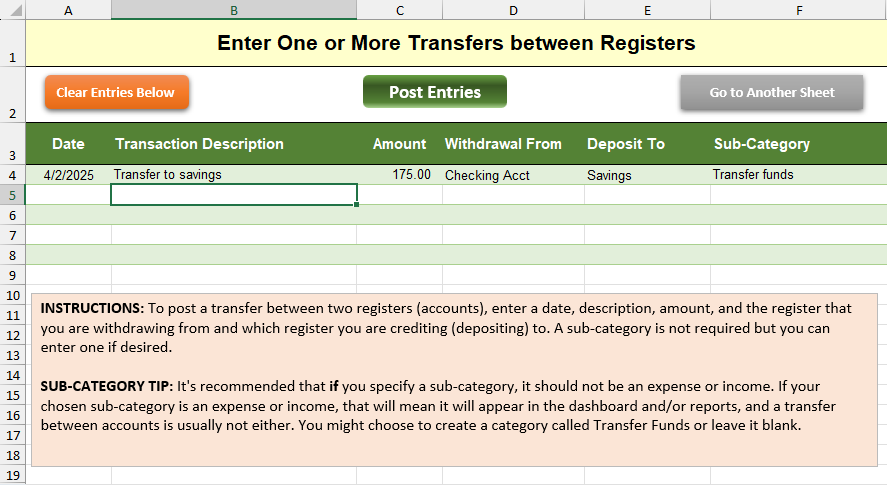
If you frequently do transfers between two different accounts (e.g., checking to savings, or checking to a credit card), this feature will streamline the process so that you only have to enter a single entry and a corresponding transaction will be created in the other account. When you click the button at the top of a register screen for Transfer to/from Acct, you’ll arrive at a screen like the one shown below. Enter the date of the transaction along with your desired description, dollar amount, and then use the drop-down buttons to choose the withdrawal account and the deposit account. The sub-category field is optional. I normally don’t populate that field as I don’t want these entries to be reflected as an expense or income when viewing the dashboard or reports screen.
Entering Future (Recurring) Transactions
There’s an optional worksheet called Future Trx where you can have recurring transactions that you would like to quickly post to your register worksheets. To quickly access this special worksheet, you can click the button labeled List Sheets and choose the Future Trx sheet from the list. One benefit of this feature is for planning or predicting your expenses and the impact they’ll have to your future account balance. Here’s how I use it, which might help you determine the best use case for yourself.
At the end of a current month, I like to have my upcoming expenses in my checking register even though they haven’t actually been paid yet. For example, maybe my mortgage or rent payment is due at the beginning of the month, along with my cable TV and cell phone bill that are also due early in the month. I’ll put those into the recurring worksheet like you see in the example below. They are entered as group “A”, and I have indicated which day of the month those bills are typically paid (e.g., the 1st of the month). I put in my preferred description, the dollar amount, and an appropriate sub-category along with the account (worksheet) that the entry should post to.
I normally post those around the end of the month. For my recurring transactions that happen later in the month, I’ll mark those as group “B”, and I’ll usually click to post them just before the middle of the month.
“What’s the skip rows thing?”
When you click the Post Them button, you’ll be asked to pick the group letter to post (A, B, C or D). The programming will go to the last entry in your register worksheet and it will begin to post the transactions you have listed. If you would like some blank rows in between that last entry and before your recurring transactions are added, you can enter a number in the Skip Rows column to indicate how many blank rows to skip over. You might want to experiment with that setting each month to decide what works best for you.
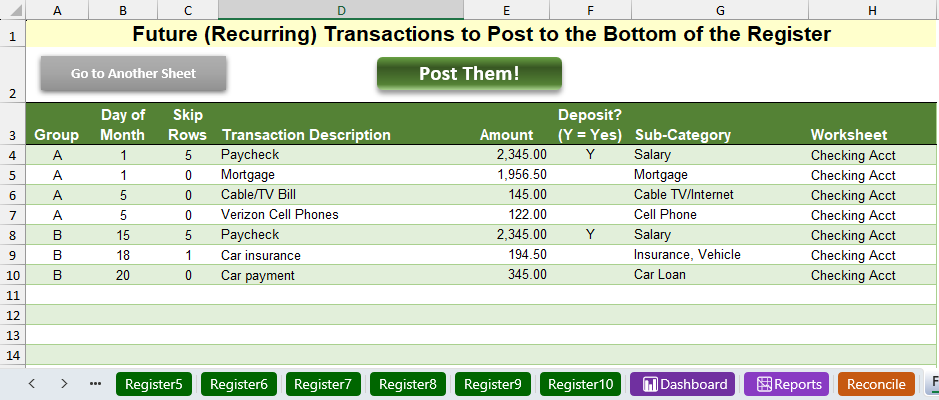
Note: you can also have your monthly or bi-monthly paycheck in the list. In the example above, a paycheck will be posted on the 1st day of the month, but the programming will skip 5 blank rows at the bottom of the checking account register before it is added. The paycheck is marked as “Y” for a deposit since it’s not a withdrawal.
How to Safely Test: Before you click the “Post Them” button for the first time, I recommend that you save your checkbook spreadsheet. When you click to post your recurring transactions, if you are unhappy with the end result, just close (exit) from your spreadsheet without saving the changes, and re-open it and adjust your entries.
Deleting Rows, Inserting Rows, and Sorting Transactions
Sometimes it can be helpful to insert blank rows in between two transactions. You might also need to occasionally delete a row (transaction). Thanks to the special Excel formula used to calculate balance, you can safely insert rows and delete rows without causing any issues. One easy way to insert a blank row is to click once into an existing cell, and then click the Insert button as shown in the screenshot below. A new blank row will appear above your mouse selection.
To delete a row, just click once on an existing cell in a row and click the Delete button in the ribbon bar.

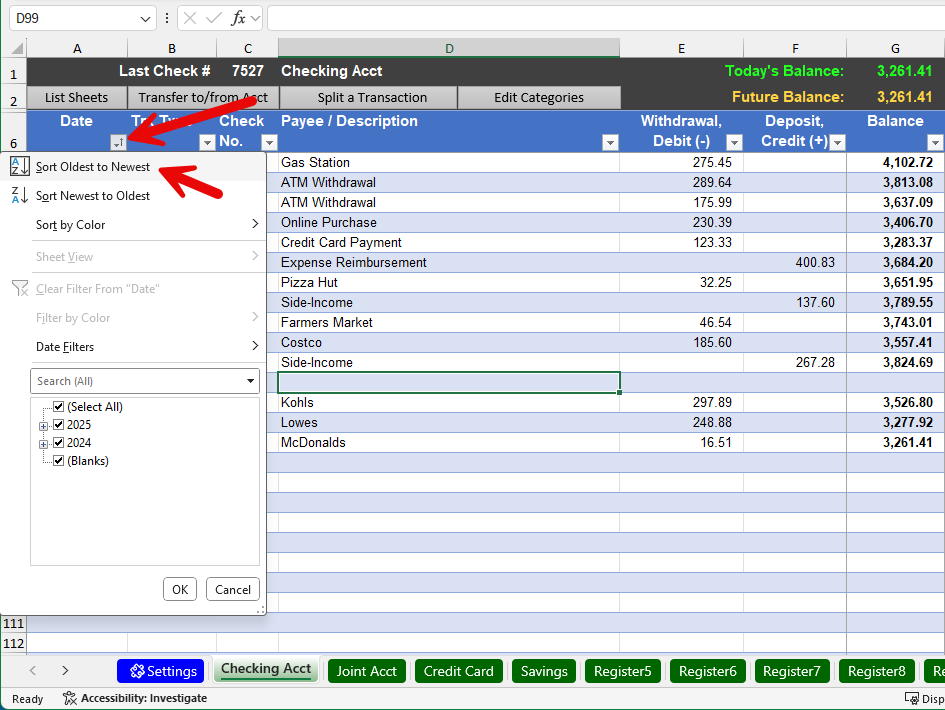
You can also re-sort your spreadsheet on the Date column at any time. A benefit for this is that you can also add new transactions at the bottom of your spreadsheet, even if they are out of date order, and then you can tell Excel to re-sort the worksheet from “Oldest to Newest” and that will re-order your transactions in ascending date order.
Important: The very first row of your register should have the oldest date to ensure that the “starting balance” row always remains at the very top. Also, never sort with “newest to oldest” as this will cause the starting balance row to be at the bottom which will cause circular reference errors in the balance formula.
Reconciling Transactions with your Monthly Bank Statement
If you need to reconcile your checkbook with your monthly bank statement, the reconcile feature can be helpful. It’s especially helpful if you have written paper checks that haven’t cleared the bank, because your bank will report a different balance vs. your checkbook. Performing a monthly reconciliation can help ensure accuracy of your checkbook.
Each register worksheet has a button labeled Reconcile On/Off which will unhide (or rehide) several rows at the top of your worksheet. Here’s an example of what will be shown after clicking that button.
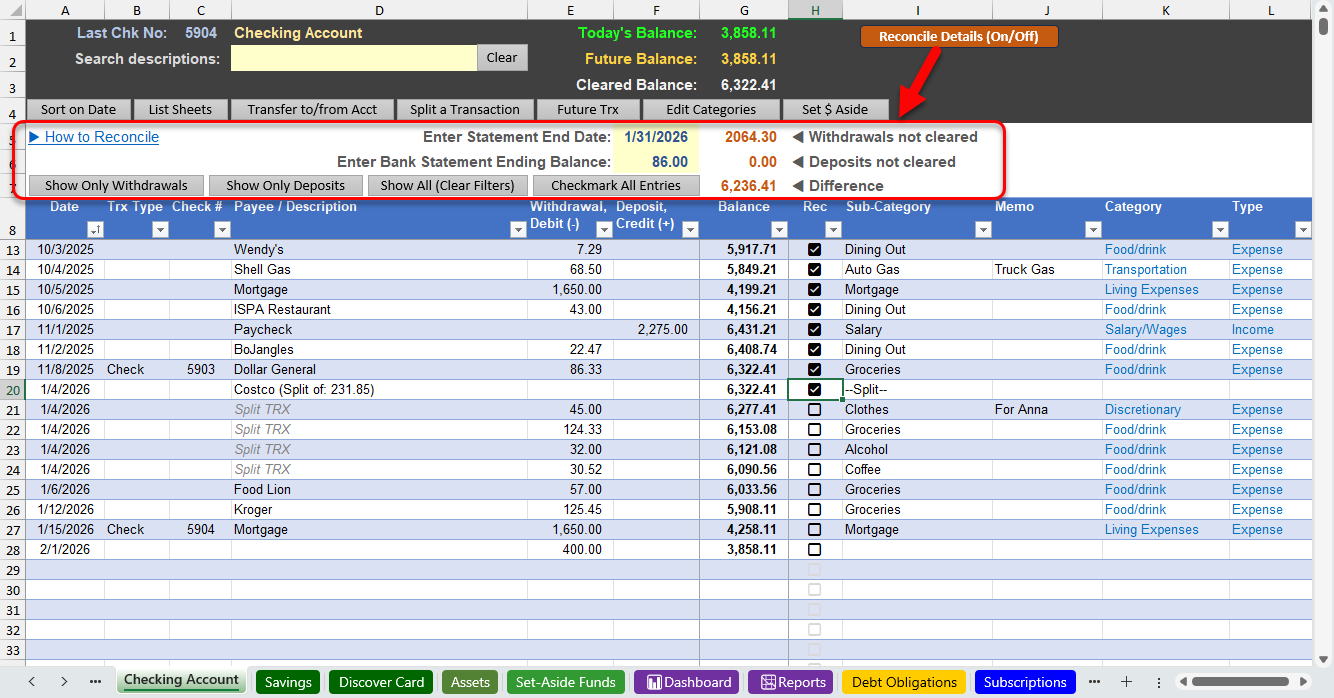
Steps to take:
- After clicking the Reconcile On/Off button, enter your bank statement’s end date and ending balance in the cells provided.
- Review each transaction for accuracy and mark each row as reconciled, either manually, or use the button for Checkmark All Entries as a fast way to mark all transactions that occur before the statement end date you provided.
Please note that the 2026 version of the Excel Checkbook made use of a Microsoft 365 feature to show interactive check-boxes for each transaction under the Rec (reconcile) column. The 2025 version of the Excel Checkbook will not show check-boxes. Instead, you can put any single letter (for example, R, c, or X) to denote the transaction is reconciled. If you see the word FALSE listed repeatedly under the Rec column, see a workaround here.