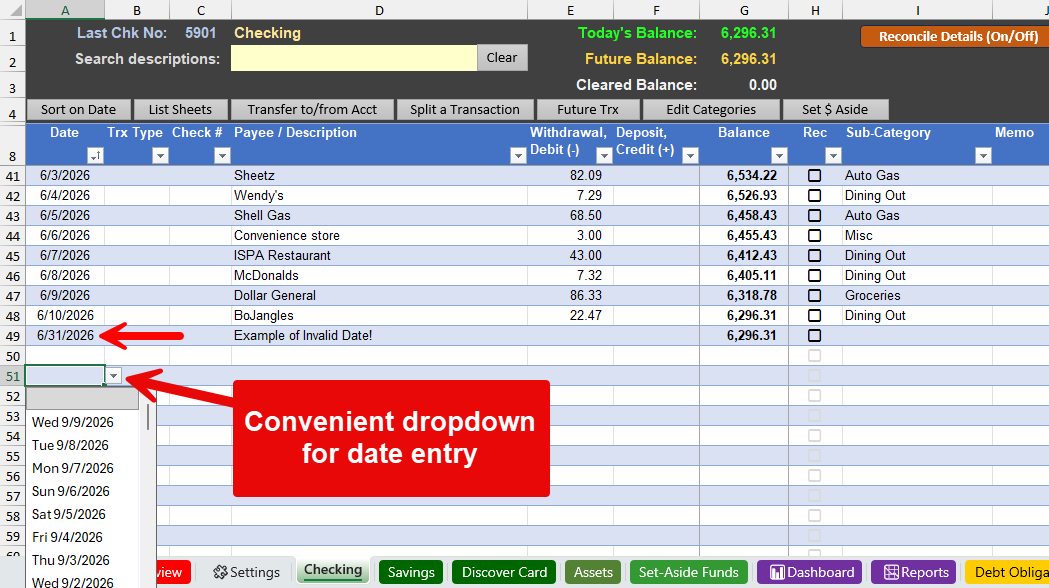
The Excel Checkbook has a convenient drop-down picker for date entry. But unfortunately, it’s possible to manually enter an invalid date during data entry. For example, Excel won’t complain if you entered a date like 6/35/2026 or 7/2025/2026. This can be a problem when you attempt to view the Dashboard or Reports and you see an error about “[dataformat.error] We couldn’t parse the input provided as a date value.” This means there’s an invalid date in one or more of your transactions. See this article on how to quickly find those entries.
You can customize the date entry to enforce valid dates, but it does mean that you’ll lose the drop-down picker for date selection. Excel only allows you to have one type of data validation in a cell. But if you rarely use the drop-down picker and you would prefer to have Excel tell you if you accidentally enter an invalid date, here’s how to change it.
How to Enforce Only Valid Dates During Data Entry
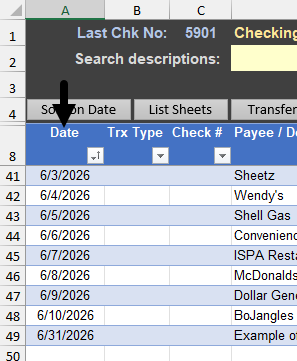
- Step 1: select the “Date” column in this special way — position your mouse so that it is slightly above the word “Date”. When you see your mouse become a black arrow that points down, click it. The entire Date column should now be selected.
- Step 2: Visit the Data menu, and click on the button for Data Validation.

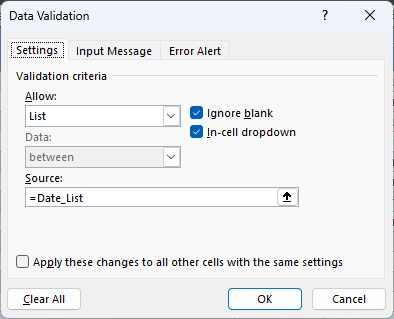
- The original settings will appear, which indicates that a source called “Date_List” will be displayed. But we want to change that. See the next step.
- Step 3: Change the “Allow” setting to be Date, and then enter a Start date and End date in the boxes provided. Make sure that you specify the oldest date that you might ever want to enter as a transaction. For the end date, my example uses December 31, 2050 as the farthest future date that I might enter.
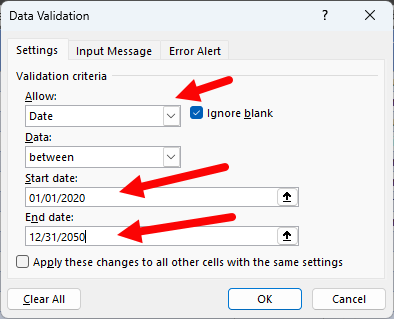
- Click OK when done. Excel will now warn you if you try to enter an invalid date.
Discover more from Excel Checkbook
Subscribe to get the latest posts sent to your email.